Planning to Paint Part II: The Ultimate Guide to Painting Your Home
Welcome to Part II of our painting series! Before diving into this guide, we recommend you read our previous blog on choosing the perfect shade. This guide will provide comprehensive advice on how to paint inside your home, covering essential painting tools, various paint finishes, and maximising the effectiveness of your paint samples.
Image by SFI with Limewash effect
Professional Recommendations
Firstly, while DIY painting can be fun and rewarding, for the best finish, we always recommend hiring professionals. They have the skills, tools, and most importantly experience to ensure a flawless result and can handle unexpected issues. However, if you’d like to give it a go yourself, then read on!
Essential Tools
You'll need a few essential tools to get started. Brushes are perfect for minor (but nonetheless crucial) painting tasks like cutting in edges, touching up coats, and covering small, thin, and/or angled surfaces (i.e. trim, mouldings, frames, sockets). Paint rollers are designed to efficiently cover large, open, uninterrupted areas (walls, floors, ceilings). Other essential painting tools include paint mixers, drop cloths, and paint trays. Good quality tools are key for a good finish, and for all your paint supply needs, we love what COAT has to offer.
Sampling Paint
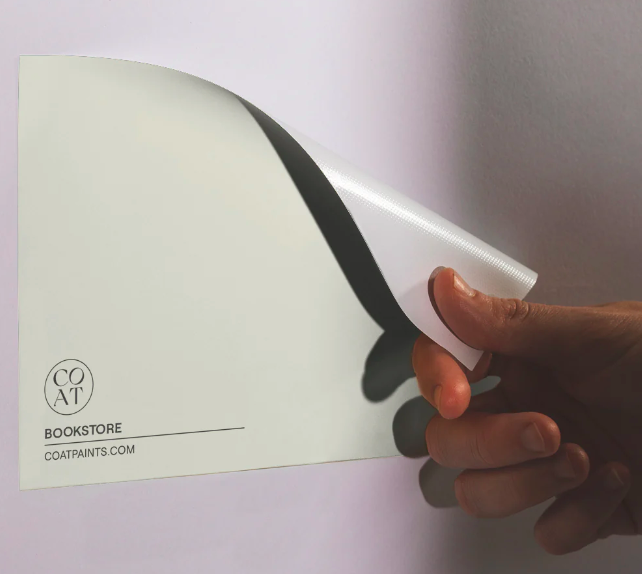
Before committing to a colour, it is important to paint samples in different corners of the room and observe how they look at various times of the day. Natural and artificial lighting can significantly change a colour’s appearance. Paint a good-sized test area, such as 30x30cm, to get an accurate idea or the true shade. Remember to note which sample is which by writing the name below each swatch with a pencil. Some brands, such as Lick and COAT offer stick-and-peel samples for convenience, so you can move them around the room itself, or even multiple rooms in your home.
Image by COAT
Room Preparation
Remove or cover furniture and protect your floors with drop cloths or plastic sheeting. Remove switch plates, outlet covers, and other fixtures to ensure a cleaner job. Make sure the room is at the right temperature for painting, ideally between 10-25°C. High humidity can affect drying time and the finish of the paint.
Priming
Primers are essential for preparing surfaces before painting as they seal porous surfaces to ensure an even finish, improve adhesion for increased durability, block stains to prevent discolouration, and provide a uniform base to enhance the paint's true colour and finish. Make sure your walls are clean, dust-free, and any imperfections have been filled and sanded.
Different surfaces require specific primers to enhance paint adhesion and durability:
Existing/Standard Painted Walls: For previously painted or non-porous walls, apply a general-purpose primer to enhance paint adhesion and ensure a smooth, even finish.
Plastered Walls: Newly plastered walls require special preparation. Apply a plaster primer or a mist coat, which is a watered-down emulsion paint, in two coats to help the topcoat adhere properly. Without this preparation, the plaster will absorb the paint, leading to waste and poor results. Always check the paint manufacturer's recommendations before starting this process.
Wood: Use a wood primer to seal the surface and improve paint adherence, as it is typically oil-based, providing better adhesion and lasting longer.
Metal: For metal, especially radiators, use a metal primer to prevent rust and flaking.
Drywall: For new drywall, use a drywall primer to ensure proper paint adhesion and to hide imperfections.
Concrete and Masonry: Use a masonry primer for concrete and brick surfaces to handle the alkaline nature and provide a stable base for paint.
Image by Dulux
Masking Tape vs. Frog Tape
Frog tape is great for DIYers! It’s slightly more expensive than masking tape but offers better protection against paint bleed, especially on delicate surfaces.
We recommend using masking tape only on non-painted areas, such as the floor, as it can pull off paint from surfaces. However, even Frog Tape can pull paint off newly plastered or freshly painted walls. In these cases, it's best to use alternatives like cardboard or a cutting-in tool, or to cut in by hand to avoid damaging the new paint. Always follow the manufacturer's guidelines for best results.
Paint Application
Start by cutting in around the edges of the room with a brush before using a roller for the larger areas. Use a ‘W’ or ‘M’ motion with your roller to apply paint evenly and avoid streaks. Apply multiple thin coats rather than one thick coat to prevent drips and achieve a smoother finish. Allow adequate drying time between coats as recommended by the paint manufacturer. Take your time, rushing between coats can often mean starting over!
Image by Little Greene
Understanding Paint Pigment
The pigment in your paint plays a significant role in how it looks when it reflects light. Simply put, pigments are tiny, solid particles that give paint its colour and help with things like making it glossy or matte, controlling how thick it is, and even preventing rust. They also help keep the cost down by filling up space in the paint. When you go for higher quality paints with more pigment, you’ll get deeper, more vibrant colours that look amazing in different lighting. Check out Little Greene or Farrow and Ball for high pigment paints.
Choosing the Correct Finish
Understanding paint finishes is crucial for achieving the desired look and durability for your project. Here’s a guide to help you make an informed decision:
Matte Finish: Matte paint has a flat, non-reflective surface that hides imperfections well but is less durable and harder to clean than finishes with more sheen; however, some brands offer washable matte options that provide easier maintenance without sacrificing the low-sheen look. Ideal for low-traffic areas such as bedrooms, living rooms, and ceilings.
Eggshell Finish: Eggshell paint has a subtle sheen that balances the ability to conceal imperfections with moderate durability and ease of cleaning, making it suitable for living rooms and dining rooms.
Satin Finish: Satin paint provides a silky, smooth look with a noticeable sheen, offering high durability and resistance to moisture and stains, ideal for kitchens and bathrooms.
Semi-Gloss Finish: Semi-gloss paint has a bright, reflective sheen that is highly durable and easy to clean, perfect for trim, doors, and high-traffic areas.
Gloss Finish: Gloss paint offers a very high sheen, creating a shiny, polished look that is extremely durable and resistant to scratches, stains, and moisture, making it ideal for accentuating architectural details and high-traffic surfaces such as doors, skirting boards, and other woodwork.
Image by Benjamin Moore
Different Paints for Different Surfaces
Choose the appropriate type of paint for each surface to ensure the highest quality finish and durability. Use wood paint for wooden surfaces like doors and skirtings, as it is typically oil-based, providing better adhesion and lasting longer. For metal surfaces such as radiators, opt for metal paint, which is also often oil-based too. Use emulsion paint for standard walls and ceilings, which are normally water-based.
Image by Farrow & Ball
Mixing Paint
When using multiple tins of the same colour, it is recommended to mix them together in a large bucket, a process known as "boxing." This ensures a consistent colour throughout the room, as slight variations between tins can lead to noticeable differences once applied to the walls. This technique helps achieve a uniform finish and prevents colour discrepancies that may occur from tin-to-tin differences.
Clean-Up
Clean brushes, rollers, and other tools immediately after use to extend their lifespan. Properly dispose of paint cans and other materials. If you're going to use the same brush or roller for the second coat, you can wrap it up in cling film, ensuring no air goes in, to keep the brush wet for the next application. For cleaning oil-based paint, use a solvent such as white spirit, as the paint will not come off with water.
Image by Brewer Decorator Centres
By following these tips and techniques, you'll be well on your way to a beautifully painted home.
If you need assistance with your home or project, feel free to reach out via our contact page. We're here to help and discuss how we can support you!
Happy painting!


